|
|
Story and 1/2 House with Gable End Windows
(UPDATED 11/25/01)
The house I am currently living in is just like the one you are designing so I have spent a lot of time working out dormers and gable end windows. It can be done but it takes some work. If your house also has dormers, take a look at this link first to get an idea for how to create dormers. The process below describes in detail how to add gable end windows in FloorPlan Version 4, 5, or 6. (The only difference is that in versions 5 and 6 it doesn't always let you add two unconnected roof pieces on one floor level. In this case just create two floor levels with the exact same properties for each roof piece). I recommend that you have some previous experience with FloorPlan before you attempt to create gable end windows. If the process below is too complicated, you can create a roof with gable end windows in TurboCad instead.
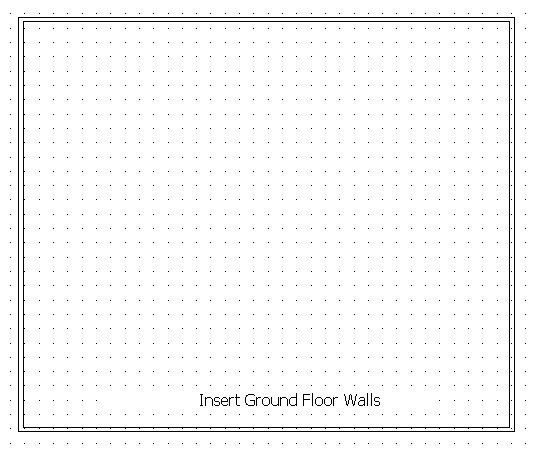
First create the Ground Floor like normal.
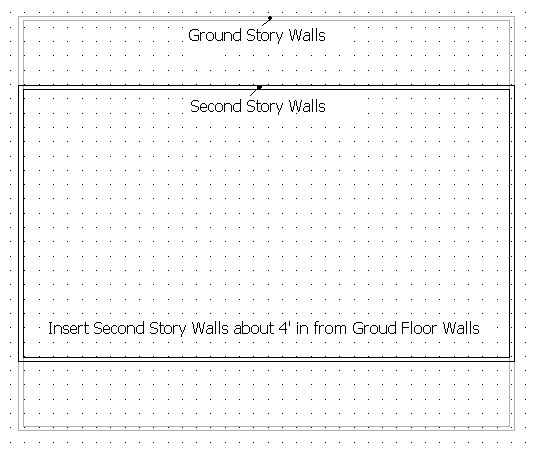
Then go to the Second Story. When the dialog box pops up, choose
Copy Existing Floor Level. Now select all the walls and change their
heights to 5' by right clicking on them and going to Edit: Properties (many
of these figures will differ from plan to plan). Drag the walls in
about 4' from the exterior of the house like in the picture below.
Next insert two walls (shown in pink in the picture below). Insert
them just far enough apart that your gable end windows will fit between
them. Then select the wall in the middle, right click and choose
Edit: Properties and change the Wall Height to 9'. Now delete the
two walls that you inserted. Repeat everything on the right side
of the house as well. Insert the gable end windows into the 9' tall
wall (or you can do this after everything else is finished).

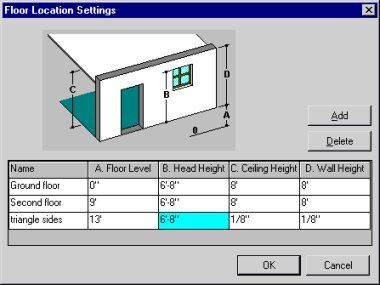
Now, create a new floor level (called "triangle sides" in this case)
by going to Tools: Locations and clicking on Add. Change A. Floor
Level to 13'. Change C. Ceiling Height and D. Wall Height to 1/8".
Now go to the new floor level and when the dialog box pops up, have it
trace the second story.
On the new story ("triangle sides") insert invisible walls in the area
between the exterior walls, and the 9' wall. It is easiest
to insert the walls farther apart (part 1 below), and then drag them closer
together (part 2 below).

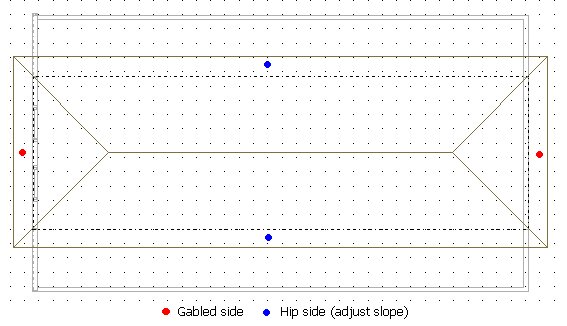
Next, insert a roof over the invisible walls. Gable the sides
marked in red below by selecting the side, right clicking and going to
Edit:Properties: Size Tab: Gable. Also adjust the Roof Overhang to
1/8". Then select the sides marked in blue below and change the Slope
to 45 degrees or the desired slope.

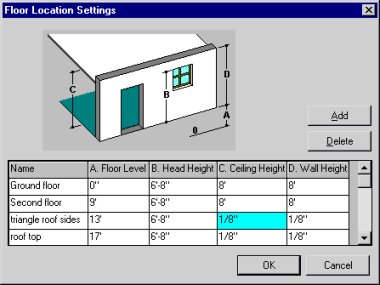
Now create another new floor level by going to Tools:Locations (I'll
call the new level "roof top"). Change A. Floor Level to 17'.
Change C. Ceiling Height and D. Wall Height to 1/8".
Go to the new floor level and when the dialog box pops up, just hit
the "x" in the top right corner (or have it trace the second floor).
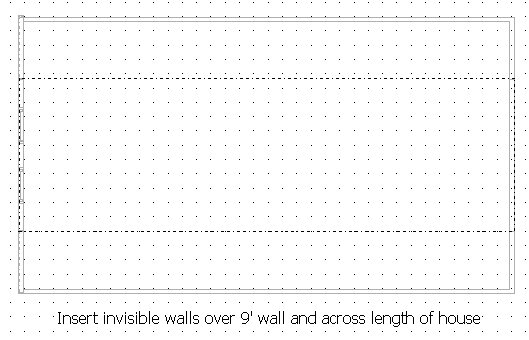
Insert invisible walls over the 9' tall walls and across the entire length
of the house.
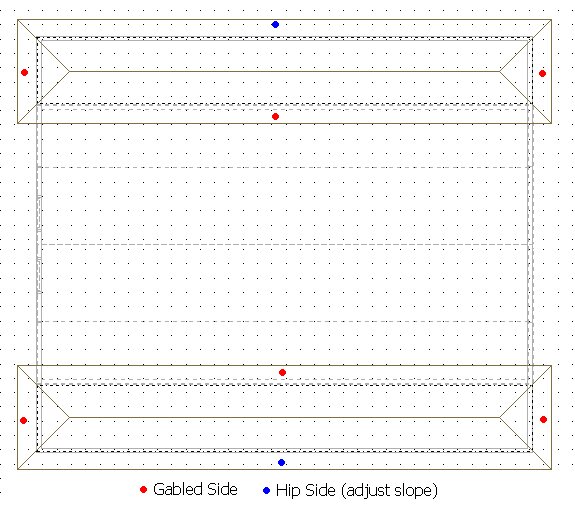
Insert a roof on the invisible walls. Gable the sides marked in
red and change the overhang to 1/8" (or desired overhang). Change
the slope of the sides marked in blue to 45 degrees (or the desired slope).
Change the overhang to 4' (or the length needed to cover the entire area
between the 9' wall and exterior second story wall)
Now go back to the Ground Floor. Go to View:Display Filter and
turn on the light bulb for the Ground Floor if it is off. Then insert
a roof over the Ground Floor. You should get a roof on the front
and back of the house like in the picture below. [If
you don't then try the followingInsert them on a new floor level with A.
Floor Level being 8', and C. Ceiling Height and D. Wall Height being 1/8"
and with invisible walls, like in the picture below, that span between
the exterior Ground Floor walls and the exterior Second Story walls.
Then insert a roof] Once you have the
roof inserted change the sides marked in red below to Gable and change
the roof overhang to 1/8" (or desired overhang). Change the slope
of the side marked in blue to 45 degrees (or the desired slope) and change
the roof overhang to 1/8" (or desired overhang)
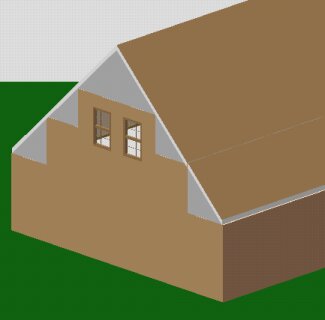
You should get a result that looks something like this. You may
need to go back to a certain floor level and adjust the walls so that the
roof pieces line up correctly. Once you are finished you can select
the gable ends, right click, and go to Edit:Properties to change the material
type so that it matches the walls. If you want a different texture
on the inside and outside, you can insert two 2" thick triangle roof pieces
on top of the wall instead of one 4" roof piece. You can also use
triangle roof pieces in the interior of the second story where diagonal
walls are need. Just insert them on a seperate floor level at the
appropriate height. See this
link for help with adding dormers on your house
If you run into any problems, need help with something else, or have any questions, let me know.
Eric Secker
E-Mail Me
|
|